Showing posts with label BLOG DESIGN. Show all posts

Monday, 17 March 2014

How to make a archive page( all post ) in your blogSpot blog?

This archive page is very easy to make if you follow our instructions carefully. So just follow our given steps bellow to make/create this page. You can also follow our screenshots bellow.
  • Go to your  blogger blog dashboard.
  • Click on pages tab form dashboard.
  • Click on new page tab and chose blank page.
Creating Page in Blogger
  • Write your page title as ‘Archives’.
  • Then Select HTML tab.
  • Now copy all bellows JavaScript codes and past inside the page.
Archives Page for blogger 2
<script type='text/javascript'>//<![CDATA[
function LoadTheArchive(TotalFeed)
{
    var PostTitles = new Array();
    var PostURLs = new Array();
    var PostYears = new Array();
    var PostMonths = new Array();
    var PostDays = new Array();
    if("entry" in TotalFeed.feed)
    {
var PostEntries=TotalFeed.feed.entry.length;
for(var PostNum=0; PostNum<PostEntries ; PostNum++)
{
     var ThisPost = TotalFeed.feed.entry[PostNum];
     PostTitles.push(ThisPost.title.$t);
     PostYears.push(ThisPost.published.$t.substring(0,4));
     PostMonths.push(ThisPost.published.$t.substring(5,7));
     PostDays.push(ThisPost.published.$t.substring(8,10));
     var ThisPostURL;
     for(var LinkNum=0; LinkNum < ThisPost.link.length; LinkNum++)
     {
  if(ThisPost.link[LinkNum].rel == "alternate")
  {
      ThisPostURL = ThisPost.link[LinkNum].href;
      break
  }
     }
     PostURLs.push(ThisPostURL);
}
    }
    DisplaytheTOC(PostTitles,PostURLs,PostYears,PostMonths,PostDays);
}
function DisplaytheTOC(PostTitles,PostURLs,PostYears,PostMonths,PostDays)
{
    var MonthNames=["January","February","March","April","May","June","July","August","September","October","November","December"];
    var NumberOfEntries=PostTitles.length;
    for(var EntryNum = 0; EntryNum < NumberOfEntries; EntryNum++)
    {
NameOfMonth = MonthNames[parseInt(PostMonths[EntryNum],10)-1]
document.write('<a href ="'+PostURLs[EntryNum]+'">'+PostTitles[EntryNum]+"</a> ("+NameOfMonth+" "+parseInt(PostDays[EntryNum],10)+", "+PostYears[EntryNum]+")<br />");
    }
}
//]]></script>
<script type="text/javascript" src="/feeds/posts/default?max-results=500&amp;alt=json-in-script&amp;callback=LoadTheArchive">// < ![CDATA[
// < ![CDATA[
// < ![CDATA[
// ]]></script>
  • Last of all save the page and you are done!
Customization's:
  • If you want to show less or more then 500 posts on the archive page then change the green highlighted text (500).
Now view your page and look its working fine. If you like this post then shear with your social media friends and subscribe our blog to get latest updates to your e-mail inbox.

Sunday, 26 January 2014

HOW TO ADD SLIDING FACEBOOK LIKE BOX FOR BLOGGER


In this tutorial i will show you how to add a cool floating Facebook like widget for Blogger that slides to the left on mouseover. Demo: You can see a static facebook badge at the right side of this blog.

 HOW TO ADD SLIDING FACEBOOK LIKE BOX FOR BLOGGER

1) Go to Blogger Dashboard  Template  Edit HTML.
2) Now Find the code shown below using [ctrl+F] (Use In HTML Box)

</head>

3) Now Paste the Code Shown Below just Before it.

<script src='https://ajax.googleapis.com/ajax/libs/jquery/1.6.1/jquery.min.js' type='text/javascript'/>

4) Now Find the code shown below using [ctrl+F] (Use In HTML Box)

</body>

5) Now Paste the Code Shown Below just Before it.

<style type='text/css'>
/*<![CDATA[*/
#fbplikebox{display: block;padding: 0;z-index: 99999;position: fixed;}
.fbplbadge {background-color:#3B5998;display: block;height: 150px;top: 50%;margin-top: -75px;position: absolute;left: -47px;width: 47px;background-image: url("https://blogger.googleusercontent.com/img/b/R29vZ2xl/AVvXsEiSX9E64Jb-X2xowGnYSsdRWDS0CrjkX8SEYqxtF8mfBnTzZzKxfIdtQeRc6ASONO5z7uyvRmQbnlDKP28OFfXVrpbS6mEm-BsP5gAdfDRIIYnUFerWhethSjcgyADj_GInnBh0nTcv5hk/s1600/vertical-right.png");background-repeat: no-repeat;overflow: hidden;-webkit-border-top-left-radius: 8px;-webkit-border-bottom-left-radius: 8px;-moz-border-radius-topleft: 8px;-moz-border-radius-bottomleft: 8px;border-top-left-radius: 8px;border-bottom-left-radius: 8px;}
/*]]>*/
</style>
<script type='text/javascript'>
/*<![CDATA[*/
    (function(w2b){
        w2b(document).ready(function(){
            var $dur = "medium"; // Duration of Animation
            w2b("#fbplikebox").css({right: -250, "top" : 100 })
            w2b("#fbplikebox").hover(function () {
                w2b(this).stop().animate({
                    right: 0
                }, $dur);
            }, function () {
                w2b(this).stop().animate({
                    right: -250
                }, $dur);
            });
            w2b("#fbplikebox").show();
        });
    })(jQuery);
/*]]>*/
</script>
<div id='fbplikebox' style='display:none;'>
    <div class='fbplbadge'/>
    <iframe allowtransparency='true' frameborder='0' scrolling='no' src='http://www.facebook.com/plugins/likebox.php?href=URL HERE&amp;width=250&amp;height=250&amp;colorscheme=light&amp;
show_faces=true&amp;border_color=%23C4C4C4&amp;
stream=false&amp;header=false' style='border:none; overflow:hidden; width:250px; height:250px;background:#FFFFFF;'/>
</div>

6) Customize your setting.Find any word click Ctrl+F.

♥ Replace it URL HERE with your Facebook Fan Page URL.

7) Now save your template.


Thursday, 19 December 2013

TOP 10 TIPS FOR CREATING A BLOG

Tips for creating a blog.There are no hard and fast rules on how to blog. Having said that, bloggers will likely increase their exposure by following some simple blog guidelines. 

1.) Stay on topic.
 

Opinions are generally accepted but the content of the items in the blog should all relate to a general theme. Unless you have an uncanny knack for wit, humor or cynicism, the majority of your readers will be interested in the content that relates to a specific defined theme or loosely defined area of interest. Most readers won't care that you eat Cheerios for breakfast. They may, however, be interested in the fact that vinegar takes out stains and that toilet paper rolls make great wreaths. Define a topic and stick to it. This will ensure that you create a loyal following of interested readers.

2.) Stay informative.
 

If you are attempting to create the impression that you are knowledgeable about a specific industry or sector, be sure that you stay current on news. If you are endorsing a product or voicing an opinion, be

How to Add Floating Social Media Sharing Buttons To Blogger

The Floating Social Media Sharing is a very popular widget on all the top blogs and this is one of the ways to increase the number of times your posts get shared on Twitter, Facebook and other social networks.

This floating social bar has the following options: Facebook Like, StumbleUpon, Twitter Share, Digg This, Google+ and each of them comes with a live counter. You can add more sharing buttons or social bookmarking icons later if you want.

Blogger, WordPress, Facebook, Share

How to add the scrolling social bookmarking bar


Step 1. Log in to your Blogger Dashboard, select your blog and go to Layout 

Step 2. Click on Add A Gadget link


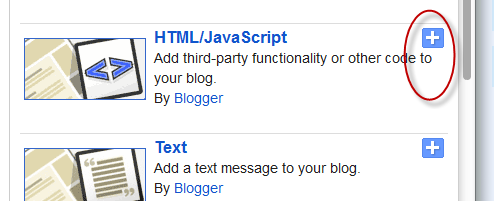
Step 3. From the pop-up window, scroll down and select HTML/Javascript  

Step 4. Copy the code below and paste it inside the empty box.

Step 5. Save the gadget.

The code to copy-paste (updated!):
 <style type="text/css">
#social-buttons {
position:fixed;
bottom:15%
margin-left:-721px;
float:left;
border-radius:5px;
-moz-border-radius:5px;
-webkit-border-radius:5px;
background-color:#fff;
padding:0 0 2px 0;
z-index:10;
}
#social-buttons .button-share {
float:left;
clear:both;
margin:5px 5px 0 2px;
}
</style>
<div id='social-buttons' title="Get this from helplogger.blogspot.com">
<div class='button-share' id='like' style='margin-left:7px;'>
<div id="fb-root"></div>
<script>(function(d, s, id) {
  var js, fjs = d.getElementsByTagName(s)[0];
  if (d.getElementById(id)) return;
  js = d.createElement(s); js.id = id;
  js.src = "//connect.facebook.net/en_US/all.js#xfbml=1";
  fjs.parentNode.insertBefore(js, fjs);
}(document, 'script', 'facebook-jssdk'));</script>
<div class="fb-like" data-send="false" data-layout="box_count" data-width="40" data-show-faces="false"></div>
</div>
<br /><div class='sbutton' style="margin-left: 2px;" ><a class='twitter-share-button' data-count='vertical' data-via='Helplogger' expr:data-counturl='data:blog.url' href='http://twitter.com/share' rel='nofollow'>Tweet</a><script src='http://platform.twitter.com/widgets.js'; type='text/javascript'></script>
<br />
<div class='button-share' style="margin-left: 3px;" id='su'>
<script src="http://www.stumbleupon.com/hostedbadge.php?s=5"></script>
</div>
<div class='button-share' id='digg' style='margin-left:3px;width:48px'>
<script src='http://widgets.digg.com/buttons.js' type='text/javascript'></script>
<a class="DiggThisButton DiggMedium"></a>
</div>
<div class='button-share' style='margin-left:3px;' id='gplusone'>
<script type="text/javascript" src="https://apis.google.com/js/plusone.js"></script>
<g:plusone size="tall"></g:plusone>
</div>
<div style="clear: both;font-size: 9px;text-align:center;">Get <a style="color: #3399BB;" href="http://SMARTSHIVENDU.blogspot.com/">widget</a></div></div></div>
Customization:
  • Vertical alignment - Change the 15% value of bottom. The code positions the social bar relative to the bottom of your browser window. To fix the distance even when window is resized, specify the value in px (pixels) instead of %.
  • Horizontal alignment - Change the -721px value from margin-left. Negative value pushes the button to the left of the main blog column, positive value pushes it to the right. Increase or decrease the value based on your needs.
  • Twitter setting - Replace Helplogger with your Twitter username
  • Replacing and removing buttons - You can replace existing buttons with your own. Each button is represented by this code:
 <div class='sbutton'> BUTTON CODE HERE </div>
    Enjoy!!! :)

    Saturday, 30 November 2013

    how to secure your blog from hacker or scammer

    Nobody wants to see their hard work maligned by a hacking attempt. Keeping your blog safe from mischievous hackers is possible by thinking ahead and ensuring that your data is as secure as you can make it. Here are a few of the ways to secure your blog.  
    1. Backup your blog regularly.                                                                                                      Don’t rely on your web host to back up your site.  It is your responsibility to backup your blog.  It you do get hacked you can go back to a previous non-hacked version.  I useBackup Buddy to back up all of my sites and love it.
    2. Keep your blog software,                                                                                                                 theme and plugins up-to-date.  In my experience most sites get hacked through outdated software.  If a theme or plugin you want to use hasn’t been updated in a while, you probably shouldn’t use it either.

    Wednesday, 20 November 2013

    how to add Recent Posts Widget with Thumbnails in Blogger

    If your blog have long posts and you want to help your visitors to find your recent posts quickly, without spending time browsing you blog searching for your older posts. Then displaying small thumbnail images adjacent to post titles in the recent post widget on your Blogger blogs could be the right fix. Now it’s time to display recent posts with thumbnails using html/JavaScript widget in blogger. This not only looks nice, but also entices visitors to click on your posts. This widget will show Title of Post, post summaries, thumbnail of post, number of comments for each post alongside the titles. Date of post etc.Today we will show how to add a Recent Posts Widget with Thumbnails for Blogger.

    Tuesday, 19 November 2013

    HOW TO ADD ROTATE EFFECT WITH DROP SHADOW IN BLOGGER POST IMAGES


    Hello Friends Today I Am Gonna Show You How To Add Rotate With Shadow Effect In Blogger when cursor go to this Post Images.So Follow My Steps.................................................


    Open Your Blogger Account

    Click On Template

    Click On Edit HTML

                                                                      Now Find The Following Code(ctrl+f)

      ]]></b:skin>

    Now Paste The Below Code Before ]]></b:skin>

    Friday, 15 November 2013

    How to Show Post Title before Blog Title in Search Results

    If you're using blogger for your blog then you may notice search engines show your Blog Title first instead of Post Title. Certainly this will affect the flow of visitors in your site. Because when someone is searching for a topic he would like to click on the site that matches his search words. But if your blog title appears first then the visitors may skip your site! 

    Today I'm gonna discuss about how can you optimize the issue of blog title and post title in search result. And remember, this trick is for blogger only. Before you start, look at the image below:

    Wednesday, 13 November 2013

    how to add related post in blogger simple way

    Related Blog Posts Widget With Thumbnails For Blogger And WordPress.3 best sources where you will get ready made related blog posts widget for your blogger blog or wordpress websites.If you heck up with adding codes and customizations for inserting related blog post widget in your blog,then here are best sources for related posts widget ,which facilitates you with this beautiful widget at ease in just single click installation.

    1.Zemanta

    1. sign up for Zemanta.
    2.Add your blog URL and click on Settings.
    3.Select the number of posts you want to display and the display theme.
    4.Now click on install on blogger button,it will direct to your blogger and install related post widget automatically.

    zemanta related blog post widget


    2.Outbrain 

    1.Choose Recommendation Type as Thumbnail as shown in the picture below.
    2.Choose your platform.
    3. once you select your platform it will ask for sign up.
    4. On Sign up it will redirect to your  selected platform and install your widget.

    Sunday, 10 November 2013

    ADD SCROLL TO TOP WIDGET FOR BLOGGER

    This tutorial I will sow how to add a smooth jquery scroll back to top widget to your blogger blog.  You can make your blog more users friendly by using this widget, because this scroll to top widget helps your blog reader to go top of your blog with a smooth scrolling. This widget scrolling effect is looks attractive. This widget is designed without any image. To know how is this widget sees our screenshot bellow or you can see this widget is working on my blog footer.  
     

    Smooth Scroll To Top, Back To Top, Go To Top  .  

    Friday, 18 October 2013

    How to add page numbers in blog

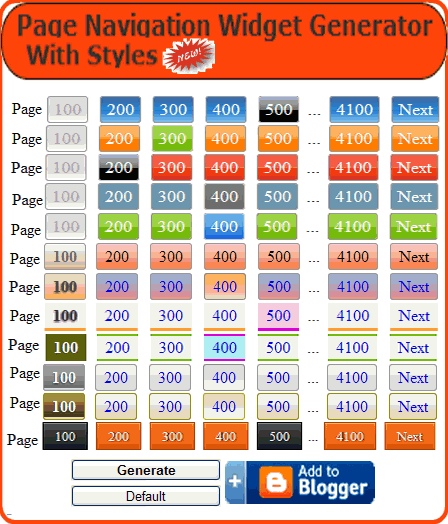
    Page number is one of the most important tool for web site navigation. It gives  your readers the opportunity of navigate the blog easily. Unfortunately blogger does not provide page number  navigation widget by default. But you can add page number to your blogger. Today I will show you how can you add page number widget to your blogger. Before that just let you know that, you can add page no. to your blogger by two ways. One is editing your blogger’s  HTML code  and another way is adding a page no. widget to your blogger’s  layout. Honestly speaking I don’t like editing HTML and it is bit difficult too. So I will show you how can you add page number to your blogger by just adding a widget. The process is very simple. Just follow the simple step…..


    How to add the blogger page numbers instead of the very old home,previous,next buttons with this new page navigation trick for all bloggers and blogspot users
    limit the search results in blogger,page number for blogspot,blogger page navigation trick
    Above is the screen shot of this trick you can say this as widget for blogger as we not touching the template of the blog see merits of this trick
    MERITS OF THIS PAGE NAVIGATION TRICK:

    Thursday, 17 October 2013

    How to Add a 'Go to Top' and 'Go to Bottom' Image link to your Blogger Blog

    Adding a "go to top" or "go to bottom" button in a blog makes it user friendly and also helps the readers to scroll up and down immediately. This button given here goes to top or goes to bottom with a "scroll". To do this, you need to add some HTML codes to your blogger template. Follow these simple steps to add a "go to top" and "go to bottom" to your blog.

    1) Go to Blogger Dashboard  Design  Edit HTML
    2) Now Find the code shown below using [ctrl+F] (Use In HTML Box)


    ]]></b:skin>
    3) Now Paste the Code Shown Below just Befor it.

    .Pc_Tools_Tips_button_up{
    padding:7px;
    background-color:white;
    border:1px solid #CCC;
    position:fixed;
    background: white url(https://blogger.googleusercontent.com/img/b/R29vZ2xl/AVvXsEj9xYdTc_l2VFux7gZeyTh6yTbRhq0HhHPPd59X16kxIdF5xwN2DFWrXjdYePfTaEb43gpRkl1EyynZGKHzSlk3GQeTd-EpfUq1VXm8PgztwlDAHdmCWjYGJHShXD5enPnEYvPky2YVLfo/h120/Pc+Tools+Tips.png) no-repeat top left;
    background-position:50% 50%;
    width:20px;
    height:20px;
    bottom:280px;
    right:5px;
    white-space:nowrap;
    cursor: pointer;
    border-radius: 3px 3px 3px 3px;
    opacity:0.7;
    filter:progid:DXImageTransform.Microsoft.Alpha(opacity=70);
    }
    .Pc_Tools_Tips_button_down{
    padding:7px;
    background-color:white;
    border:1px solid #CCC;
    position:fixed;
    background: white url(https://blogger.googleusercontent.com/img/b/R29vZ2xl/AVvXsEj4BdjjWArHBXXW9TEVURZC8yJrlKrouYfpGhL-lTZyIsqX8niZsbA9HnqqrC6YhQg_HtR4_6DBDHAe4PUalIsm3XXg-I4LLjcVSUrjTqqcmh028hxC0ESTkRBjND9737Pgugrc-H_XE3g/h120/Pc+Tools+Tips.png) no-repeat top left;
    background-position:50% 50%;
    width:20px;
    height:20px;
    bottom:242px;
    right:5px;
    white-space:nowrap;
    cursor: pointer;
    border-radius: 3px 3px 3px 3px;
    opacity:0.7;
    filter:progid:DXImageTransform.Microsoft.Alpha(opacity=70);
    }
     
    4) Now Find the code shown below using [ctrl+F] (Use In HTML Box)

    </body>

    5) Now Paste the Code Shown Below just Befor it.


    <script src='http://ajax.googleapis.com/ajax/libs/jquery/1.7.1/jquery.min.js' type='text/javascript'/>

    <div class='Pc_Tools_Tips_button_up' id='Pc_Tools_Tips_button_up' style='display:none;'/>
    <div class='Pc_Tools_Tips_button_down' id='Pc_Tools_Tips_button_down' style='display:none;'/>

    <script>
    //<![CDATA[
    (function(){var special=jQuery.event.special,uid1='D'+(+new Date()),uid2='D'+(+new Date()+1);special.scrollstart={setup:function(){var timer,handler=function(evt){var _self=this,_args=arguments;if(timer){clearTimeout(timer)}else{evt.type='scrollstart';jQuery.event.handle.apply(_self,_args)}timer=setTimeout(function(){timer=null},special.scrollstop.latency)};jQuery(this).bind('scroll',handler).data(uid1,handler)},teardown:function(){jQuery(this).unbind('scroll',jQuery(this).data(uid1))}};special.scrollstop={latency:300,setup:function(){var timer,handler=function(evt){var _self=this,_args=arguments;if(timer){clearTimeout(timer)}timer=setTimeout(function(){timer=null;evt.type='scrollstop';jQuery.event.handle.apply(_self,_args)},special.scrollstop.latency)};jQuery(this).bind('scroll',handler).data(uid2,handler)},teardown:function(){jQuery(this).unbind('scroll',jQuery(this).data(uid2))}}})();

    $(function() {
    var $elem = $('body');
    $('#Pc_Tools_Tips_button_up').fadeIn('slow');
    $('#Pc_Tools_Tips_button_down').fadeIn('slow');
    $(window).bind('scrollstart', function(){
    $('#Pc_Tools_Tips_button_up,#Pc_Tools_Tips_button_down').stop().animate({'opacity':'0.2'});
    });
    $(window).bind('scrollstop', function(){
    $('#Pc_Tools_Tips_button_up,#Pc_Tools_Tips_button_down').stop().animate({'opacity':'1'});
    });
    $('#Pc_Tools_Tips_button_down').click(
    function (e) {
    $('html, body').animate({scrollTop: $elem.height()}, 800);
    } );
    $('#Pc_Tools_Tips_button_up').click(
    function (e) {
    $('html, body').animate({scrollTop: '0px'}, 800);
    } );});
    //]]>
    </script>

     
    6) Now Save Your Template.

    Thursday, 10 October 2013

    Simple social following widget for blogger and wordpress

    In this post I am going to show you how to add a simple clean Social Following widget withFacebook, Twitter, and Google plus, RSS and YouTube logo. I designed this widget especially for my blog. But now I decide to shear this widget with all bloggers, and then I create this post for who want to use it. So, if you want to use this widget on your blog just follow my instruction bellow, and see our given screenshot to know how this widget is.
      Sosial Following widget

    How To Add This Social Widget On Your Blogger Blog?

      Now just follow my given instruction to add this widget to blogger /blogspot.
    • Go to Blogger Dashboard > Locate your Blog > Layout
    • Select an HTML/JavaScript Widget.
    • Copy bellows code and Paste into the widget.
    • Save the gadget and you are done! 

    Tuesday, 24 September 2013

    HOW TO SHOW POST TITLE ONLY ON HOME PAGE IN BLOGGER


    I will explain to you in this tutorial how to show post title only in the Home page in your blogger blog. this a simple code works on show titles only and is not a title and post together, where the title appears on the home page of the blog just by clicking on it redirects to the main post, and to be able to install this code in your blog, follow these simple steps:

    Friday, 20 September 2013

    how to convert url blogspot.in to blogspot.com


    Hello Friends,
        If You Have a Blog On Blogspot. You Noticed That When You Open Your Blog In India Then It Could Be Automatically Redirected To Blogspot.in And When Your Blog Open In Australia Then It Is Redirected To Blogspot.com.au. This Is a Redirection Starts From Google To Country Specific Url. Today I Tell You How To Redirect Blogspot.in To Blogspot.com Permanently.

    Advantage Of This Country Specific Redirection Is This If Your Blog Or Any Page Of Your Blog Is Blocked By Google In a Specific Country Then Your Blog Or Blocked Page In Continuous Open In Another All Countries.

    Friday, 13 September 2013

    HOW TO CUSTOMIZE BLOGGER LABELS WITH CSS EFFECTS

    Hello Friends Today I Am Gonna Show You How To Customize Blogger Labels With Css Effects.Its Looks Fabulous And Helps To Increase Your Blog Traffic.So Follow My Steps.....................


    Open Your Blogger Account

    Click On Template

    Click On Edit HTML

    Now Find The Following Code

    ]]></b:skin>

    After Find The Code Paste The Below Code Before ]]></b:skin>

    Wednesday, 11 September 2013

    HOW TO CHANGE READ MORE TEXT WITH IMAGE ON BLOGGER


    Hello Friends I am Back.Have You Ever Noticed In Many Blogs Read More Text Is Change With Image.But It's How.SO Today I am Gonna Show You How To Change Read More Text With Image On Blogger.So Follow My Steps................


    1-> Login Your Blogger Account

    2-> Click On Template And Go To Edit HTML

    3-> Find The Following Code  (Tip For Search The Code Press CTRL+F)

    Thursday, 15 August 2013

    HOW TO DISABLE COPYING TEXT FROM YOUR BLOG?

    Exclusive content is usually under the eyes of thieves, who steal these posts and articles without permission or even the source said, so I've written this post to stop this process.

    1. Go to Blogger Dashboard > Template
    2. Download a copy of your template
    3. Now click on Edit HTML
    4. Use Ctrl + F to find <head> and paste the following code after it.

    Add Stylish Multi Colored Popular Post Widget In Blogger


    Popular posts is a widget provided by blogger which shows a list of most viewed posts from your blog.Recently we provide a hack about customizing blogger's official popular posts widget now using same trick we will customize popular posts widget with awesome style.The main part of this hack is you don't need to add any heavy JavaScript or any other scripts we will apply this hack with using only CSS.

     HOW TO ADD STYLISH POPULAR POST WIDGET IN BLOGGER

    1) Go to Blogger Dashboard  Template  Edit HTML.
    2) Now Find the code shown below using [ctrl+F] (Use In HTML Box)

    ]]></b:skin>

    3) Now Paste the Code Shown Below just Before it.

    #PopularPosts1 ul li a:hover{color:#fff;text-decoration:none}
    #PopularPosts1 ul li a {-webkit-text-size-adjust: auto; -webkit-text-stroke-width: 0px;  color: #333333; display: block; font-family: Georgia, 'Times New Roman', Times, serif; font-size: 13px; font-style: normal; font-variant: normal; font-weight: normal; letter-spacing: normal; line-height: 18px; margin: 0px 40px 0px 0px; min-height: 30px; orphans: 2; padding: 0px; text-align: -webkit-auto; text-decoration: none !important; text-indent: 0px; text-transform: none; white-space: normal; widows: 2; word-spacing: 0px;}
    #PopularPosts1 ul li .item-thumbnail{float:left;border:0;margin-right:10px;background:transparent;padding:0;width:51px;height:51px}
    #PopularPosts1 ul li:first-child:after,
    #PopularPosts1 ul li:first-child + li:after,
    #PopularPosts1 ul li:first-child + li + li:after,
    #PopularPosts1 ul li:first-child + li + li + li:after,
    #PopularPosts1 ul li:first-child + li + li + li + li:after,
    #PopularPosts1 ul li:first-child + li + li + li + li + li:after,
    #PopularPosts1 ul li:first-child + li + li + li + li + li + li:after,
    #PopularPosts1 ul li:first-child + li + li + li + li + li + li + li:after,
    #PopularPosts1 ul li:first-child + li + li + li + li + li + li + li + li:after,
    #PopularPosts1 ul li:first-child + li + li + li + li + li + li + li + li + li:after{position:absolute;top:10px;right:5px;border-radius:50%;border:2px solid #ccc;background:#353535;-webkit-box-shadow:0px 0px 5px #000;-moz-box-shadow: 0px 0px 5px #000;width:30px;height:30px;line-height:1em;text-align:center;font-size:28px;color:#fff}
    #PopularPosts1 ul li:first-child + li + li + li + li + li + li + li {background:#DF01D7;width:90%}
    #PopularPosts1 ul li:first-child + li + li + li + li + li + li + li:after{content:"8"}
    #PopularPosts1 ul li:first-child + li + li + li + li + li + li + li +li{background:#B041FF;width:90%}
    #PopularPosts1 ul li:first-child + li + li + li + li + li + li + li + li:after{content:"9"}
    #PopularPosts1 ul li:first-child + li + li + li + li + li + li + li +li +li{background:#F52887;width:90%}
    #PopularPosts1 ul li:first-child + li + li + li + li + li + li + li + li + li:after{content:"10"}
    #PopularPosts1 ul li:first-child + li + li + li + li +li{background:#7ee3c7;width:90%}
    #PopularPosts1 ul li:first-child + li + li + li + li + li:after{content:"6"}
    #PopularPosts1 ul li:first-child + li + li + li + li + li +li{background:#f6993d;width:90%}
    #PopularPosts1 ul li:first-child + li + li + li + li + li + li:after{content:"7"}
    #PopularPosts1 ul li:first-child + li + li + li + li{background:#33c9f7;width:90%}
    #PopularPosts1 ul li:first-child + li + li + li + li:after{content:"5"}
    #PopularPosts1 ul li:first-child + li + li + li{background:#c7f25f;width:90%}
    #PopularPosts1 ul li:first-child + li + li + li:after{content:"4"}
    #PopularPosts1 ul li:first-child + li + li{background:#ffde4c;width:90%}
    #PopularPosts1 ul li:first-child + li + li:after{content:"3"}
    #PopularPosts1 ul li:first-child + li{background:#ff764c; width:90%}
    #PopularPosts1 ul li:first-child + li:after{content:"2"}
    #PopularPosts1 ul li:first-child{background:#ff4c54 ;width:90%}
    #PopularPosts1 ul li:first-child:after{content:"1"}
    #PopularPosts1 ul{margin:0;padding:0px 0;list-style-type:none}
    #PopularPosts1 ul li{position:relative;margin:6px 0;border-radius:25px 0px 25px 0px;border:2px solid #f7f7f7;-webkit-box-shadow:3px 3px 3px #000;-moz-box-shadow: 3px 3px 3px #000;padding:10px}

    4) Now save your template.

    5) Go to Blogger Dashboard  Layout  Page Elements.
    6) Add a Popular Posts Gadget.

     You have to edit some settings on your Popular Posts widget as shown below and then save the widget.